16 Firewood Storage Ideas That Keep Wood Dry Outdoors
 Save
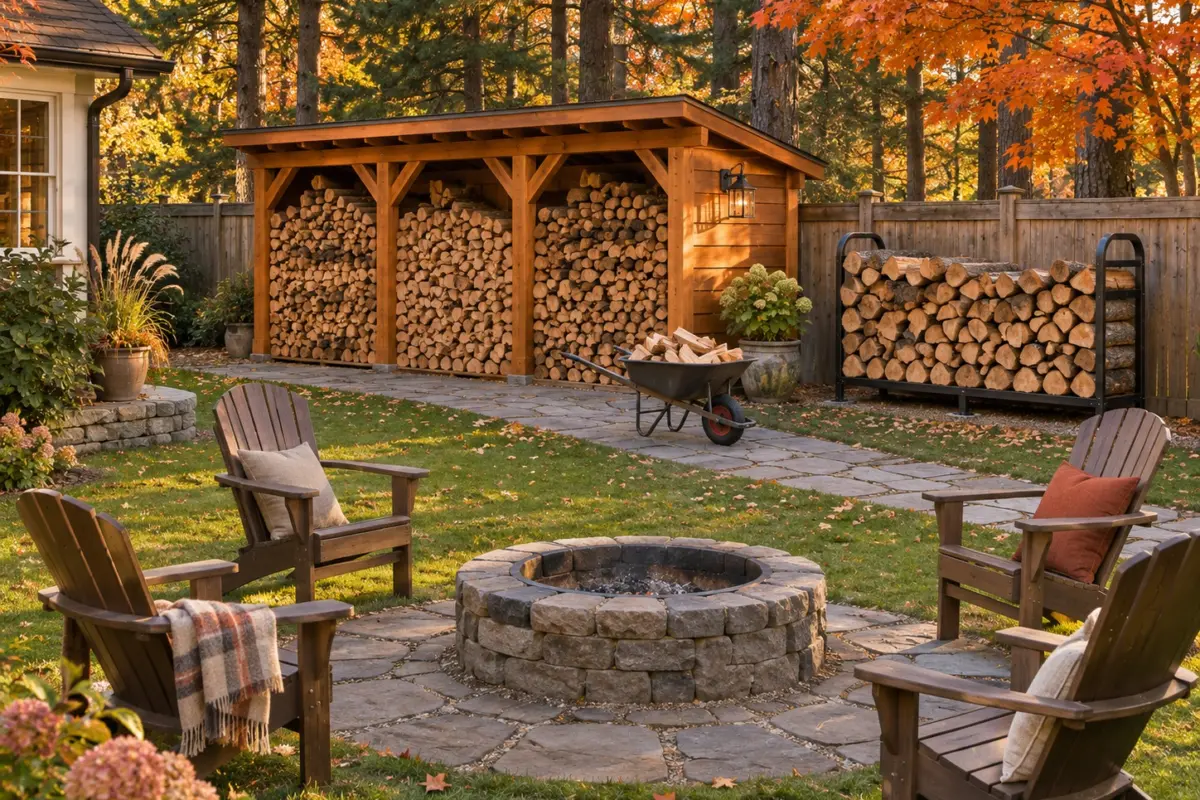
Good firewood storage ideas all do the same three things: keep the wood off the ground, keep rain off the top and let wind through the sides. Get those right and a simple steel rack can dry wood about as well as a cedar shed; get them wrong and the wood hisses and smokes in the fire pit all winter.
Need only a little wood for a backyard fire pit? Ideas 2, 10 and 11 are the quick ones.
1. The Three Rules: Off the Ground, Covered on Top, Open on the Sides
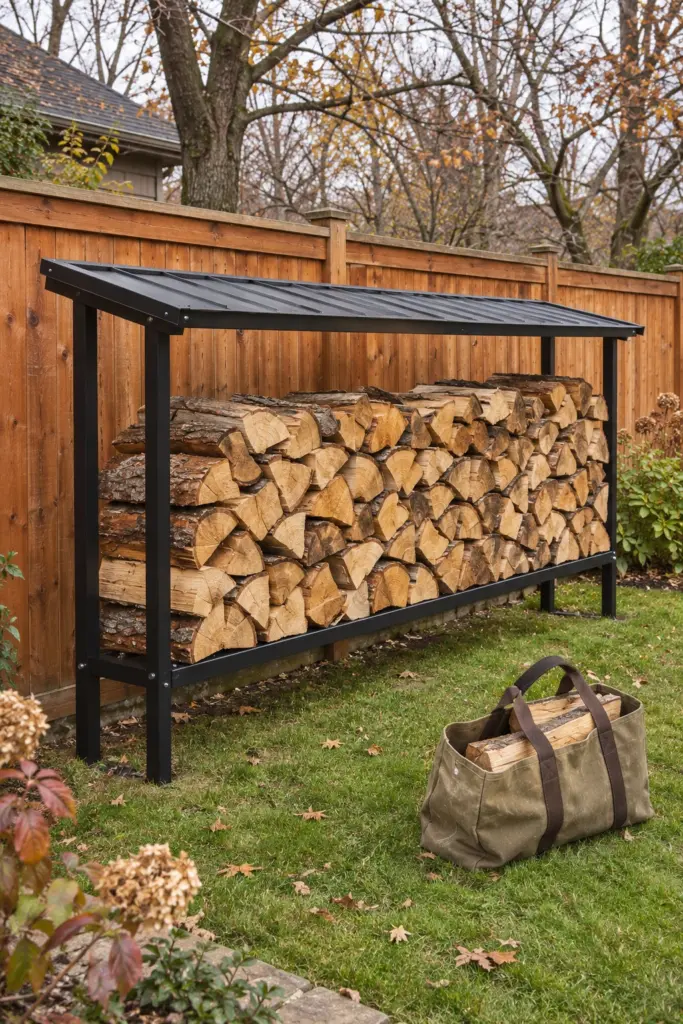
Wood dries from the ends and the sides, and it rots from the bottom. Lift the bottom row at least a few inches on a rack, pallets or two rails so ground moisture can't wick up. Cover only the top, so rain and snow run off. Leave the sides open, because moving air is what carries the water out. Split pieces dry far faster than whole rounds, and a single row with a gap behind it dries faster than a deep pile. Everything else in this list is just a different way to do these three things.
2. A Steel Log Rack With a Top Cover
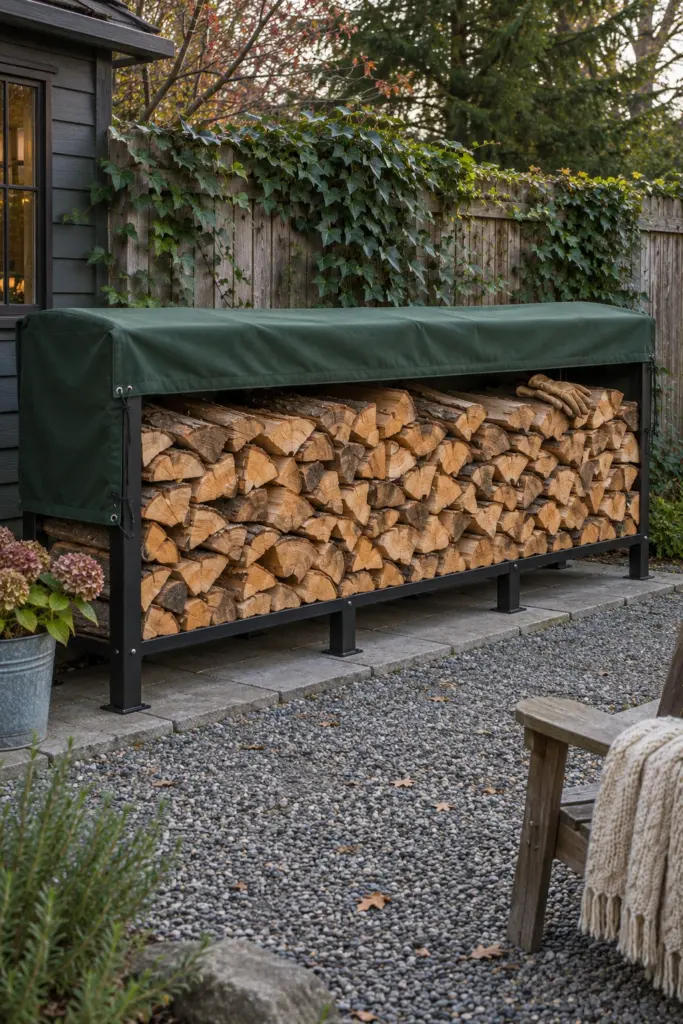
The cheapest way to start is a powder-coated steel log rack with a fitted cover. Racks come in lengths from about 4 to 12 feet, they hold the wood a few inches off the ground, and most covers only drape the top foot or so of the sides, which is exactly what you want. Set the rack on pavers or gravel rather than lawn so the legs don't sink and the grass under it doesn't stay wet. It is the easiest of these outdoor firewood storage options to move later.
3. DIY Cinder Block and 2×4 Rack
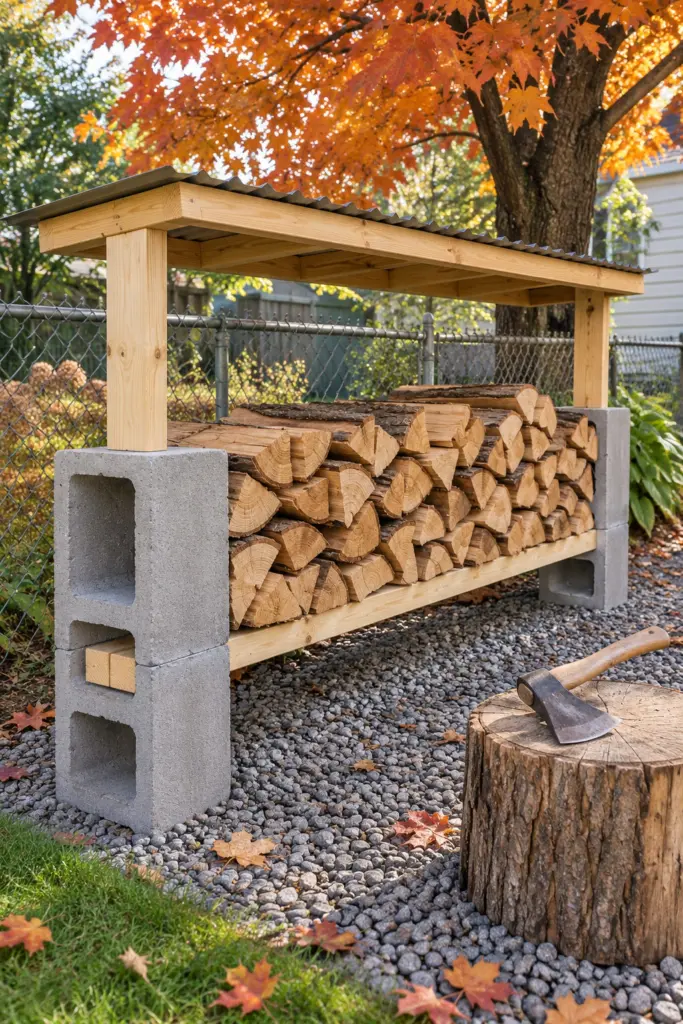
Four cinder blocks and a few 2x4s make a sturdy rack in an afternoon. Lay two blocks on their sides at each end, slide two long 2×4 rails through the holes to form the base, and stand two shorter 2x4s upright in the remaining holes at each end to hold the stack in. Screw a cross brace between each pair of uprights so the ends can't splay. Use the same three rules from idea 1: rails off the ground, a sheet of corrugated roofing or a tarp strip on top, sides open.
4. An Open-Sided Lean-To Firewood Shed
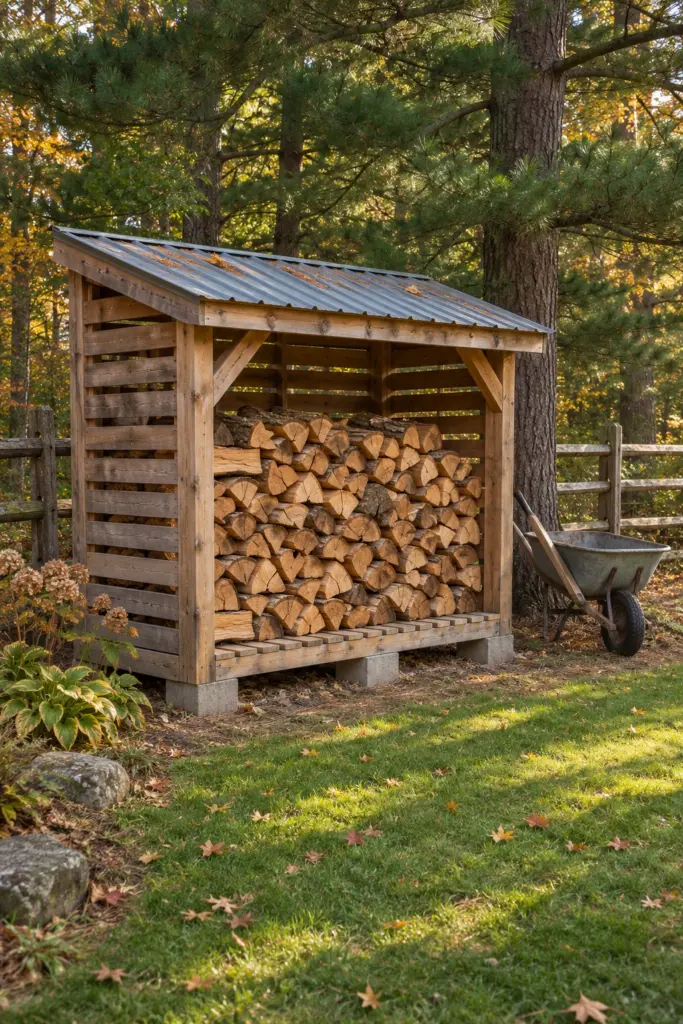
For a full winter's supply, a small lean-to shed is the classic answer: a slanted roof, a slatted floor on blocks, slatted or open sides and an open front. Unlike a garden shed, it should never be sealed up, because airflow is the whole point. Face the open side away from the prevailing wind if your area gets driving rain. Plan a roof overhang of several inches at the front, and check whether your town needs a permit for a structure that size before you build.
5. A Pallet Firewood Rack
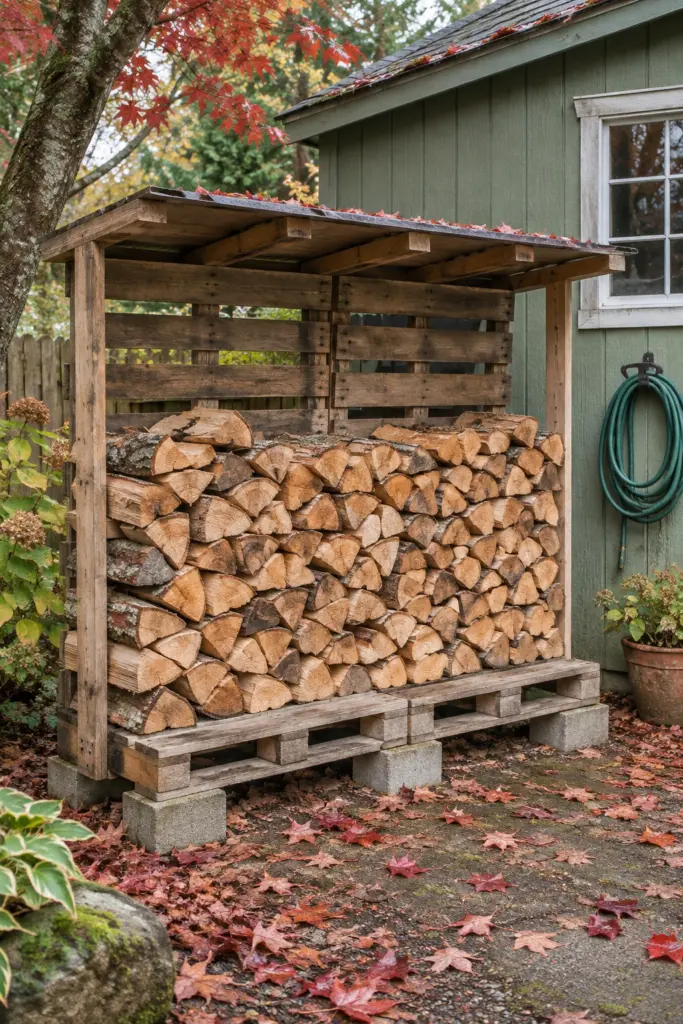
Two pallets laid flat on blocks or pavers as a floor and two or three standing up behind as a back wall make a free rack if you can find clean pallets. Screw the uprights to the floor pallets, and the slats give you the airflow built in. Stack the wood across the floor pallets in rows, and keep the roof from idea 1 on top. Check the pallets each fall and replace any that show rot, splits or loose boards.
6. The Round Holz Hausen Stack
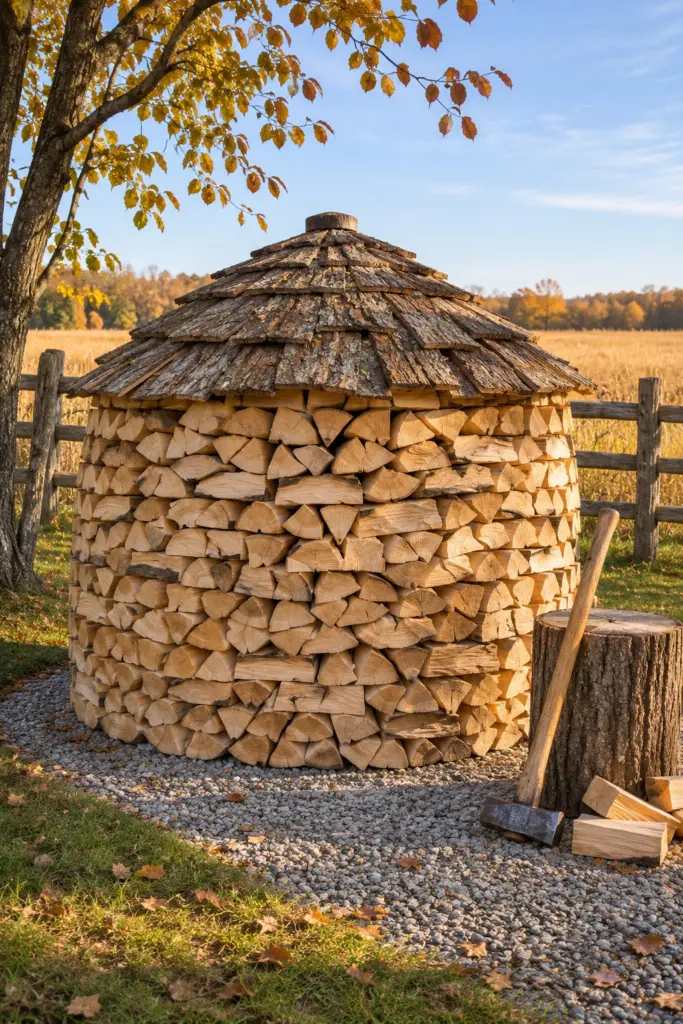
A holz hausen is a round, beehive-shaped stack with no rack at all. The outer ring of splits slopes slightly inward, the middle is filled with pieces standing on end, and the top is finished with splits laid bark side up like shingles. The shape sheds rain and the gaps let air through. It takes practice to build straight, so start small, around 6 feet across, and build it on a base of poles or gravel rather than bare soil.
7. Crib-Stacked Ends Between Two Posts
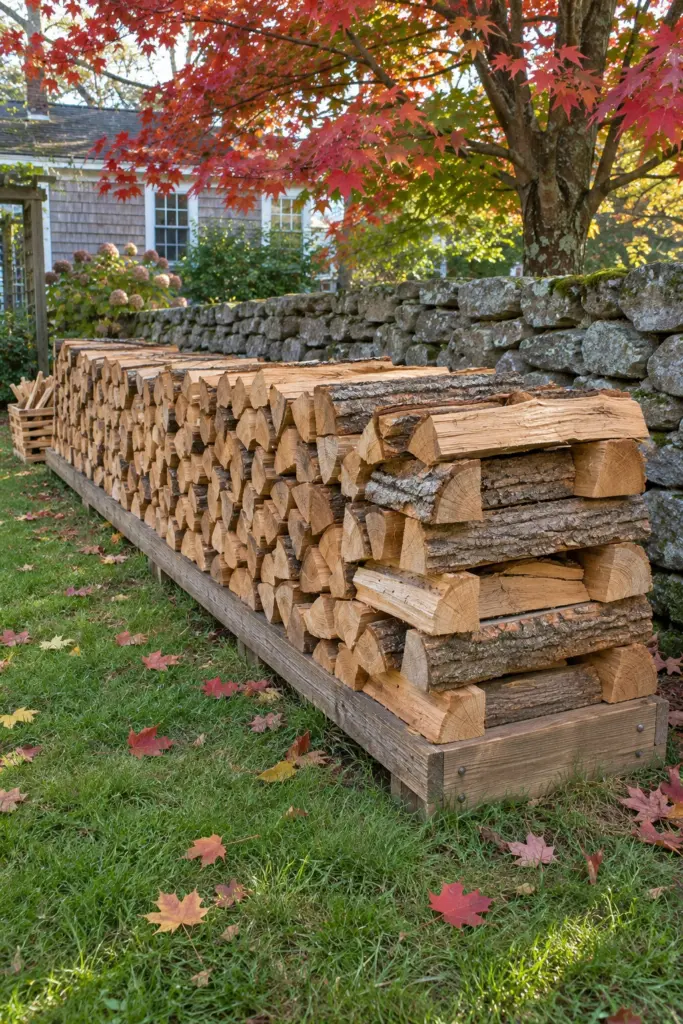
No rack? Stack a single long row between two posts, or build the ends yourself with a crib: pairs of splits laid at right angles, layer over layer, like a log cabin corner. The crossed ends hold the row upright without any hardware. Keep the row on two rails or a strip of pavers, as in idea 1, and keep it to a height you can reach without a step, since a tall, narrow stack can lean and fall.
8. Keep the Main Pile Away From the House
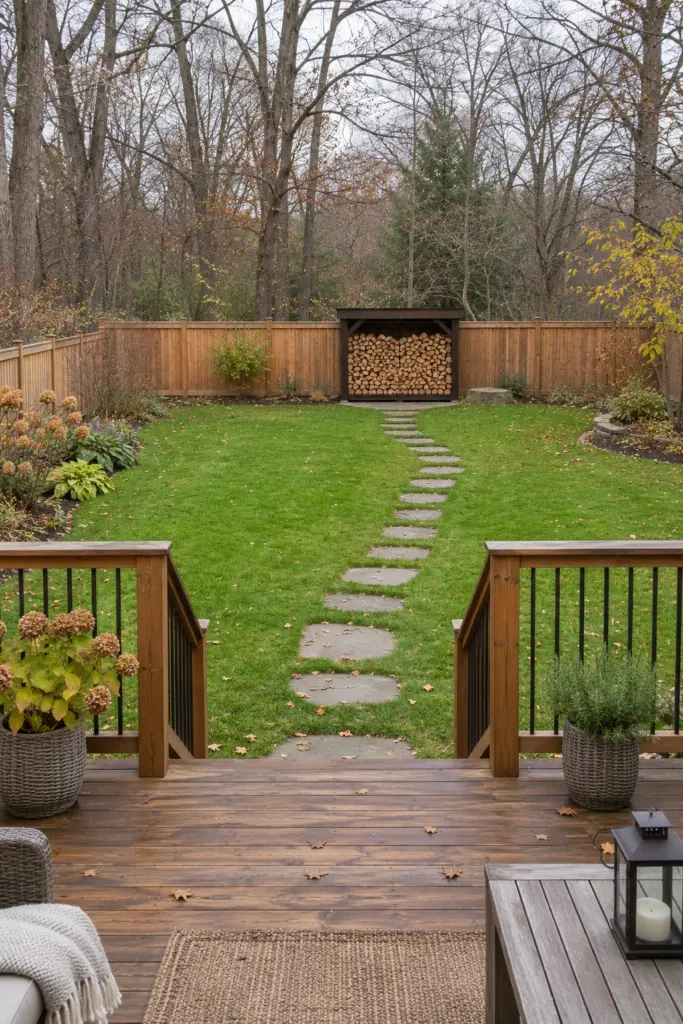
The big pile belongs out in the yard, not against the house. A stack touching siding or a deck traps moisture and can give termites a path to the house, while carpenter ants go for the damp wood it keeps wet, and in wildfire country it puts fuel right where embers land. The ideas for a small supply near the door are in idea 10; the winter supply should live on a rack or in a lean-to well out from the walls.
9. A Rack Along the Back Fence
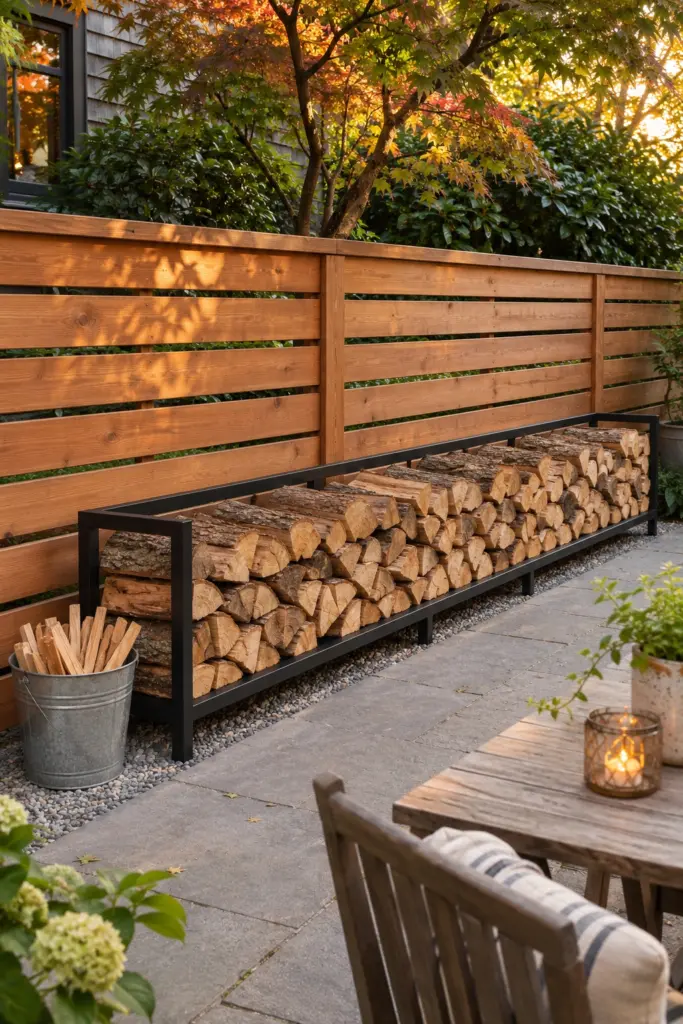
In many yards the back fence line is the spot farthest from the house; measure it from the house and deck first. Run a long, low rack parallel to the fence, but leave a gap of several inches behind it so air can move and the fence boards stay dry. A stack pressed against a wooden fence holds moisture against it for months. The fence also makes a handy windbreak for the wood, and from the lawn the stack reads as a tidy texture rather than a mess.
10. A Small Rack by the Door for Two or Three Days
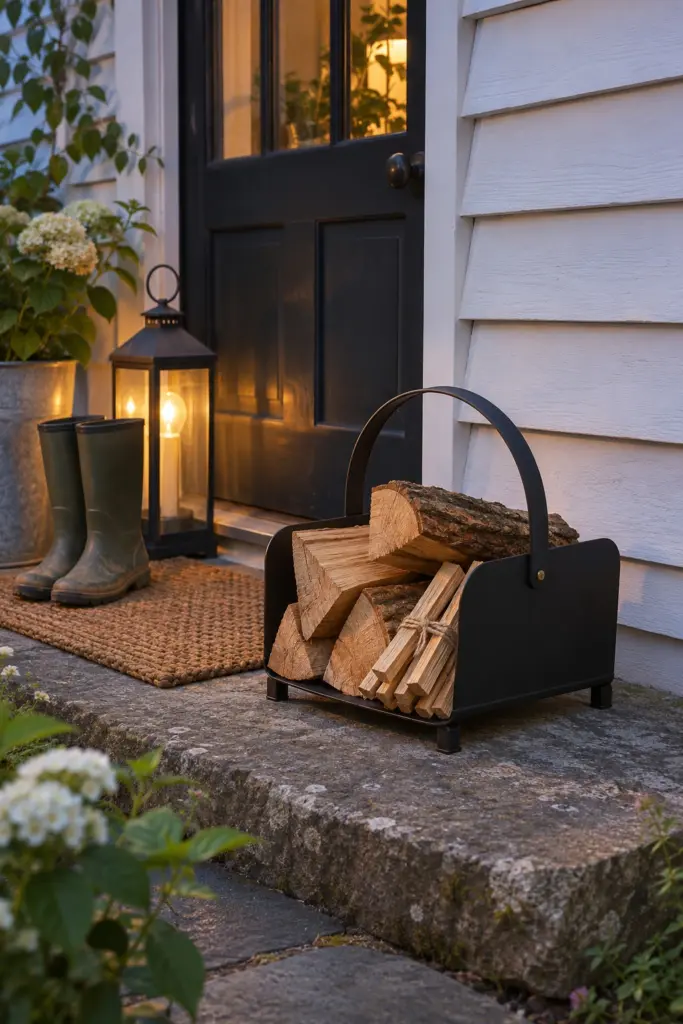
Walking to the back of the yard every time you want a fire gets old, so keep a small rack or a log basket near the back door with only two or three days' worth. Top it up from the main pile in idea 8. Keeping the near-door supply small limits what can crawl out of it. Set the holder on a stone step, a paver or a metal tray rather than on wood decking, and keep it a little away from the siding.
11. A Wood and Kindling Station Near the Fire Pit
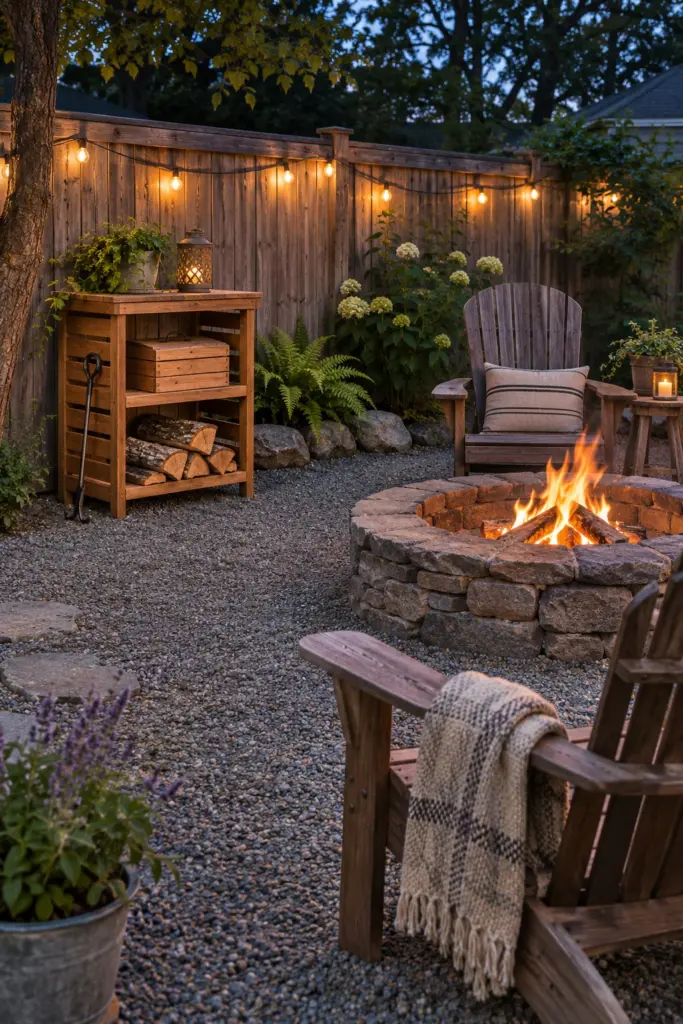
A small stand near the fire pit keeps the night's logs and a box of kindling within reach, so nobody walks off into the dark mid-fire. Keep it outside the clearance the pit's manual and local rules give, in every direction, and only big enough for one evening. If you are still planning the seating, the fire pit seating layouts post shows where a stand fits without blocking the walkway. The main supply stays back at the rack from idea 2 or idea 4.
12. Cover the Top With a Tarp Strip, Not a Wrap
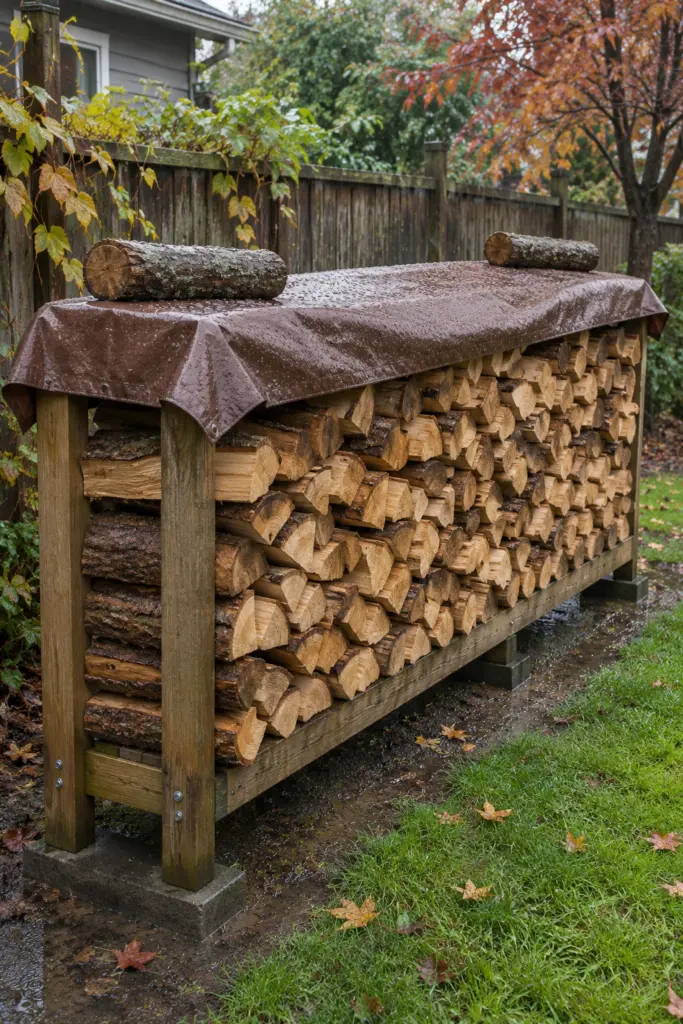
A tarp is fine, as long as it only covers the top. Fold it so it sheds rain off the top but leaves most of the sides open, and weigh it down with a couple of splits or bungee it to the rack. Wrapping the whole stack traps the moisture coming out of the wood, and you get mold instead of dry fuel. A sheet of corrugated metal roofing laid on top does the same job and lasts longer.
13. Season It Before You Burn It
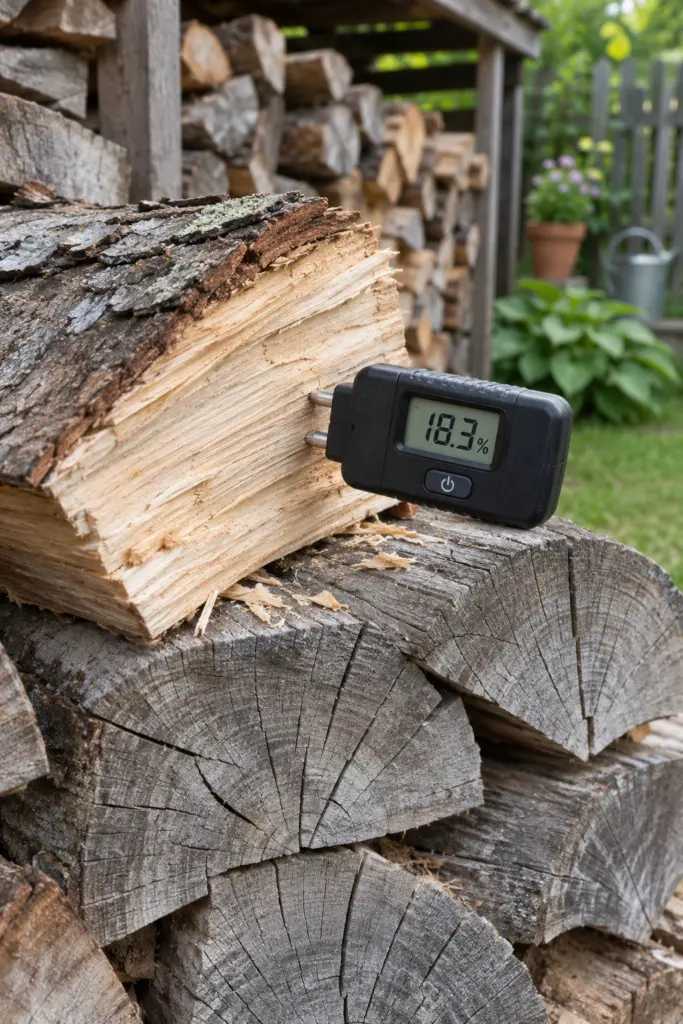
Fresh-cut wood is full of water. It needs to be split, stacked by the rules in idea 1 and left to dry, often 6 to 12 months or more depending on the species and your climate. Cracked ends, grayer color, lighter weight and a hollow knock are rough clues. The deciding test is a moisture meter: split a piece and test the fresh face. Wet wood is one of the biggest reasons a backyard fire pit smokes.
14. Buy by the Cord and Know What You Are Getting
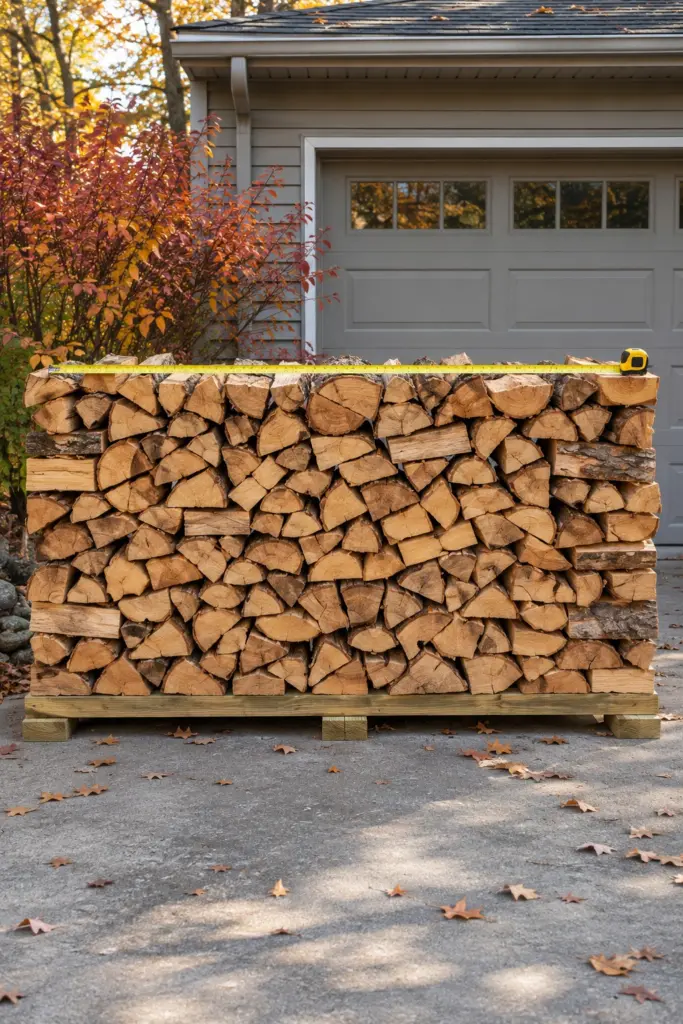
Ordering wood? Measure your storage first. A full cord is 128 cubic feet of stacked wood, usually 4 feet high, 4 feet deep and 8 feet long. Face cord is not a standard quantity; how much wood it holds depends on the seller and the length of the pieces. Ask the seller for the stack size and piece length, and whether the wood is seasoned or green.
15. Buy It Where You Burn It
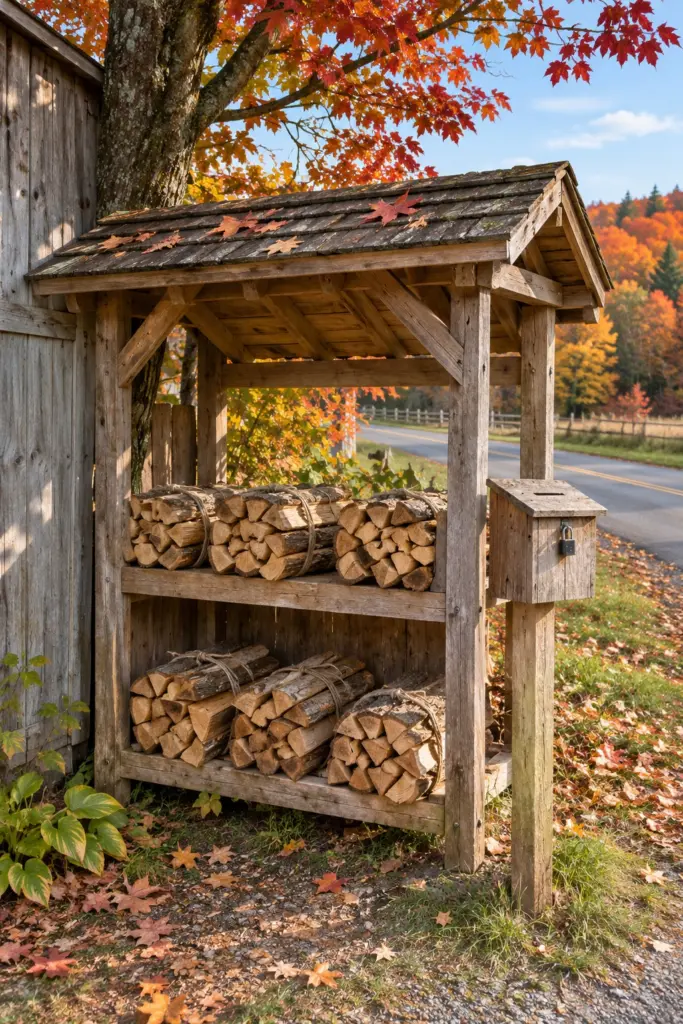
Firewood can carry tree-killing insects and diseases, and moving it long distances is one of the ways pests like the emerald ash borer spread to new areas. Some states and counties restrict bringing firewood in, especially into parks and campgrounds. Buy wood from a local seller, use certified heat-treated firewood if you need to travel with it, and check your state's rules before moving firewood at all, including when you move house.
16. A Log Niche Built Into a Stone Fire Pit Wall
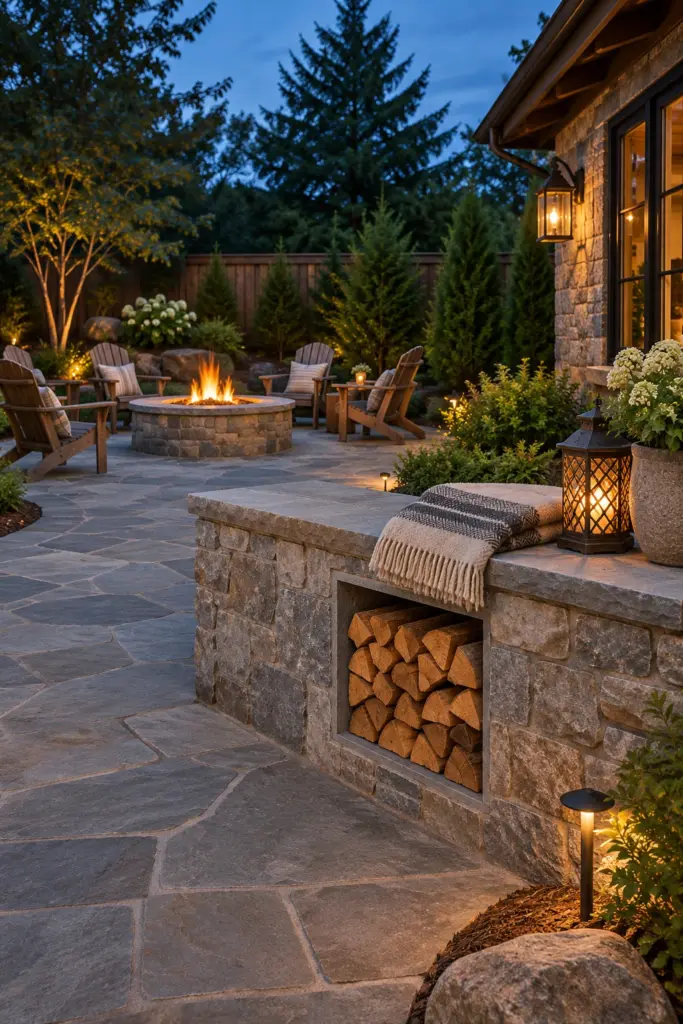
If you are building a stone or block fire pit area, a recessed log niche in a seating wall or pillar makes storage part of the design. It only holds an evening's worth, and it must sit outside the clearance the pit's manual and local code give, never in the pit wall itself. The stone fire pit ideas post covers seat walls and pillars that can take a niche, and the main winter supply still goes on a rack like the ones in idea 2 or idea 3.
Final Thoughts
Whatever storage you choose, the same three rules do the work: off the ground, covered on top, open on the sides. Start with a steel rack or a block-and-2×4 rack, put it as far from the house as your yard allows, and buy a season ahead so the wood has time to dry. Dry wood is the real upgrade for any backyard fire pit; for the pit itself, see the backyard fire pit ideas, or the small backyard fire pit ideas if space is tight. Pin this before the next delivery arrives.
Frequently Asked Questions
As far as your yard reasonably allows. Firewise guidance for wildfire-prone areas says at least 30 feet, and Ohio State's extension notes some experts suggest 20 to 30 feet to keep termites and carpenter ants away. Never stack the main supply against siding or under a deck, and check local rules.
Cover the top only. A roof, a sheet of roofing or a tarp strip keeps rain and snow off, while open sides let air carry moisture out. Wrapping the whole stack traps moisture and can make the wood moldy.
Split, stacked wood often needs 6 to 12 months or more, depending on the species and your climate. EPA guidance says wood burns best at 20 percent moisture or less, so a moisture meter is the easiest way to know.
A rack made from clean heat-treated pallets set on blocks, or a cinder block and 2×4 rack, can cost very little. Both work as long as the wood sits off the ground with a cover on top and the sides left open.
Loved this? Pin it so you can find it later.
Pin this post
Sana Ahmed
Hi! I’m Sana, and I’m always looking for fresh ideas to make outdoor spaces more beautiful and enjoyable. I love exploring everything from cozy patios and pergolas to backyard fire pits, privacy solutions, and charming garden sheds. I’ll be sharing the ideas that catch my eye and hopefully help you find a little inspiration for your own outdoor space.
All postsKeep reading