18 Wooden Pergola Ideas: Styles, Woods and Finishes
 Save
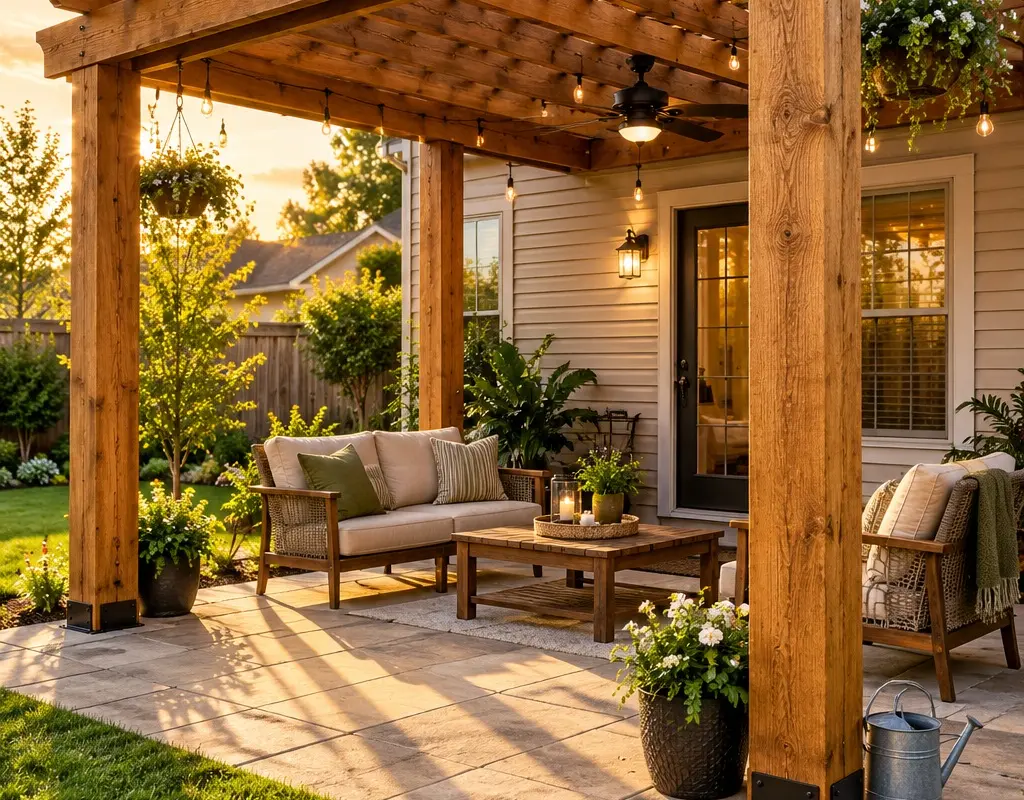
The most useful wooden pergola ideas start with a question the photos skip: what does this wood cost per year of standing, not per board? That is the number I look for first, because a cedar frame at nearly twice the price of pine can close much of that gap once restaining, warped boards and repairs are counted. The 18 ideas below run by species, cedar, redwood, pressure-treated pine, then hardwoods and two less common timbers, and finish with the stain, paint and bare-wood choices that decide how often you are back on a ladder. Each carries a rough cost, an upkeep reality or the detail that usually goes wrong. Save this to Pinterest so the numbers are handy when you price your lumber list.
1. Rough-Sawn Cedar Pergola With a Honey-Toned Oil Stain
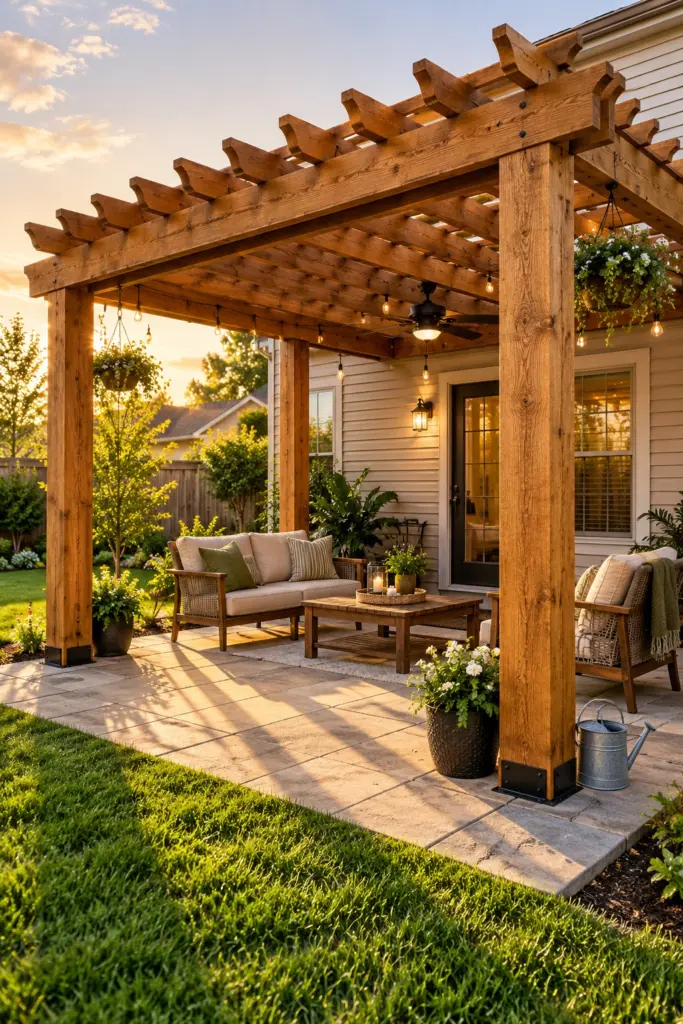
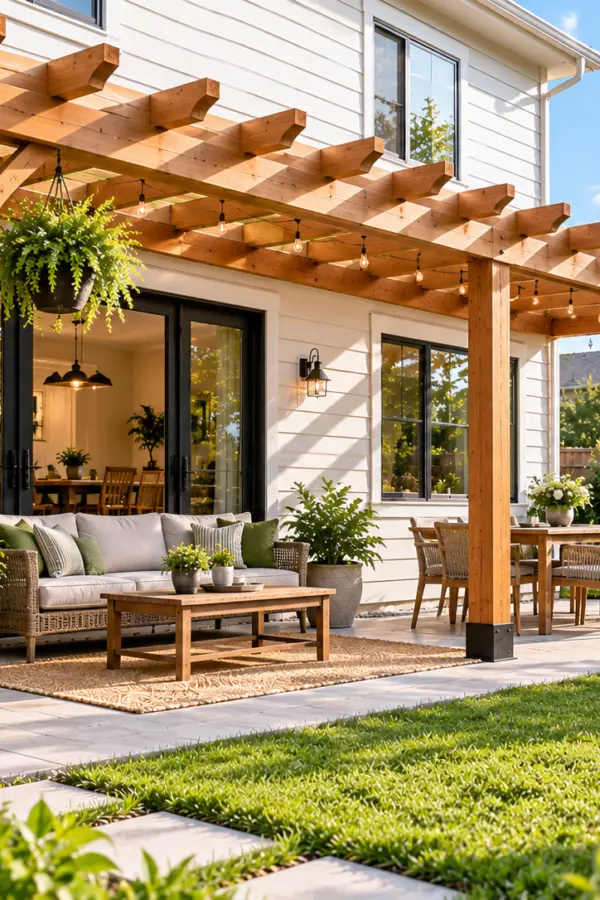
Rough-sawn western red cedar soaks up a penetrating oil stain and turns a warm honey color that reads as natural rather than painted, so it sits easily between a patio and a lawn. Recreate it with 6×6 cedar posts, doubled 2×10 beams, 2×6 rafters at 16 inches on center and a semi-transparent oil-based stain in a cedar or honey tone. Rough-sawn faces drink far more stain than smooth boards, so expect less coverage than the can promises and buy an extra gallon.
2. Cedar Pergola Left to Weather Silver-Gray Over a Gravel Patio
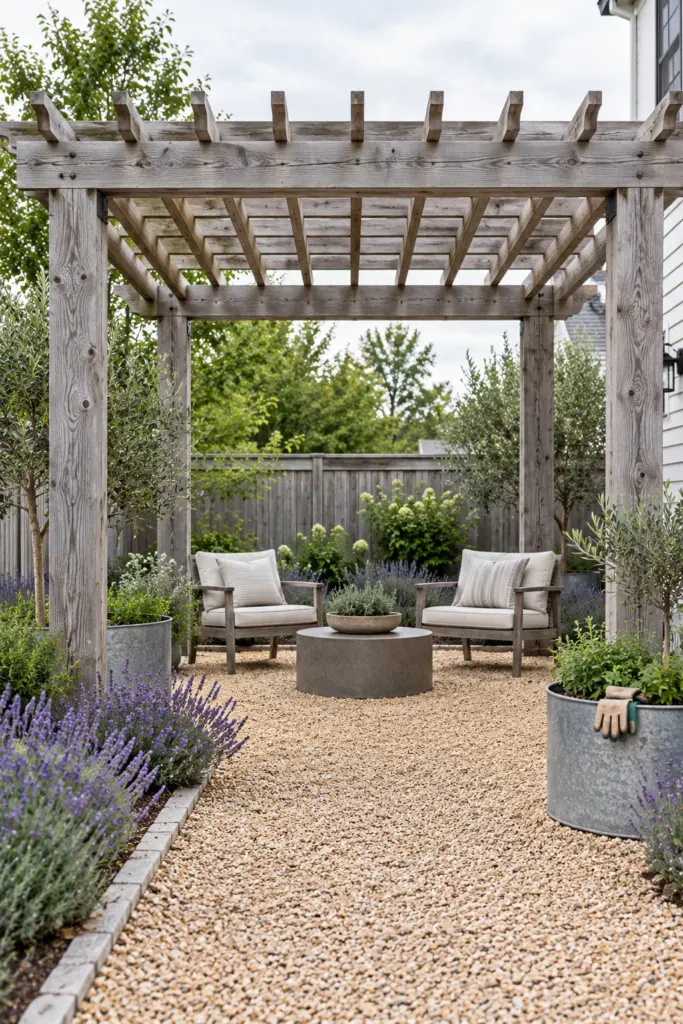
Leaving cedar completely bare is a real finish, not neglect: in full sun it fades from tan to a soft silver-gray that sits quietly beside gravel, stone and gray-green planting. Build the frame as usual, skip the stain entirely, and pair it with pea gravel, galvanized steel planters and a border of lavender, around 2 feet tall at maturity, backed by Russian sage at 3 to 4 feet. Plan for uneven graying, because shaded boards stay tan longer than sun-baked rafters. For anyone who never wants to pick up a stain brush, this is the one I would choose.
3. Cedar Pergola With Shaped Rafter Tails Over an Outdoor Dining Table
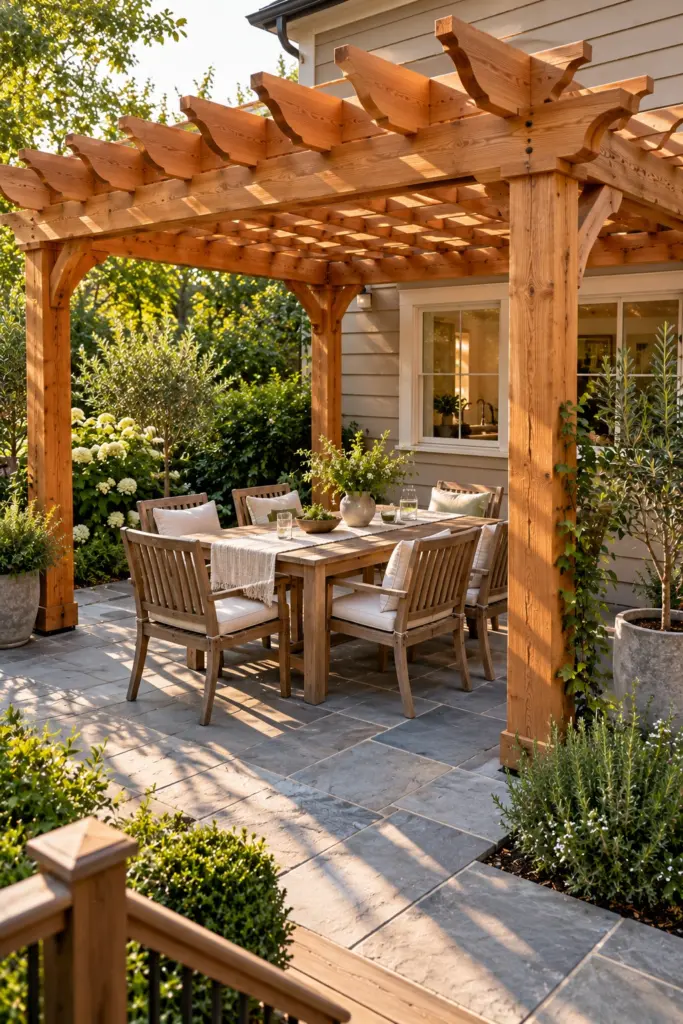
Shaped rafter tails make a cedar pergola look designed rather than assembled, because the curved or angled end catches light along the edge of the roof line. Cut a simple ogee curve or a 45-degree bevel on 2×6 cedar rafters, run them over doubled beams, and set a teak dining table for six underneath with a pale linen runner. Center the table under the frame rather than under the patio, so chairs pulled back from the table still sit inside the shade line.
4. Clear-Finished Cedar Pergola Built With Hidden Fasteners
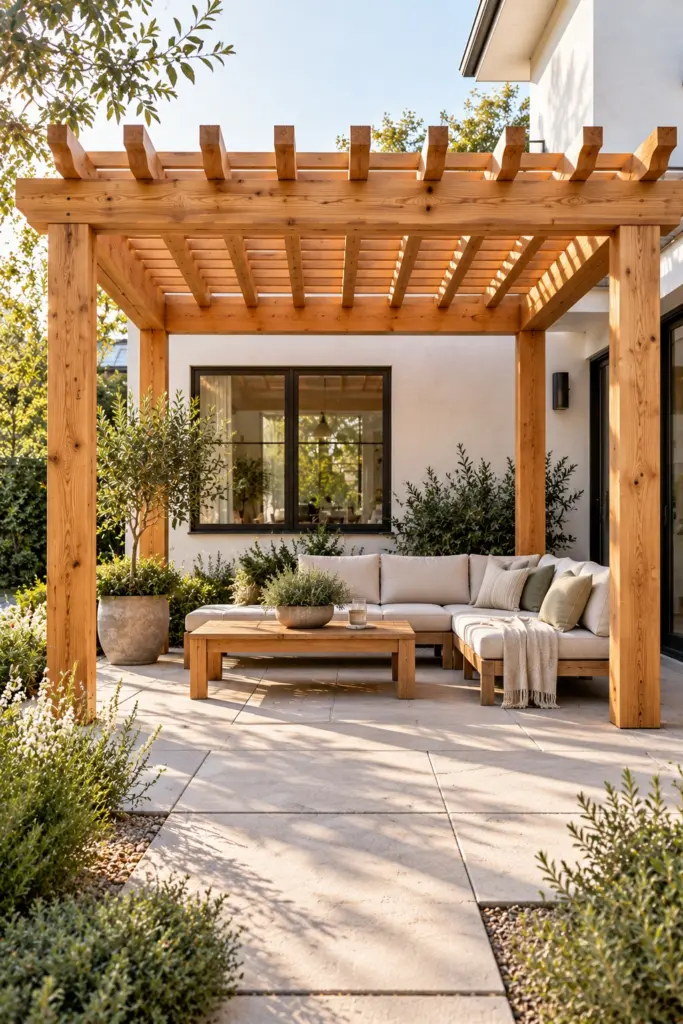
Hidden fasteners keep a clear-finished cedar pergola looking like clean joinery instead of a hardware display. Use concealed beam brackets and structural screws driven from below or behind, stainless trim screws for anything that must show, and a clear penetrating sealer with UV protection over the whole frame. Set it on pale concrete pavers beside white stucco so the grain is the only pattern in view. Pre-drill any screw within about 2 inches of a board end, because cedar splits easily.
5. Heart Redwood Pergola on a Herringbone Brick Patio
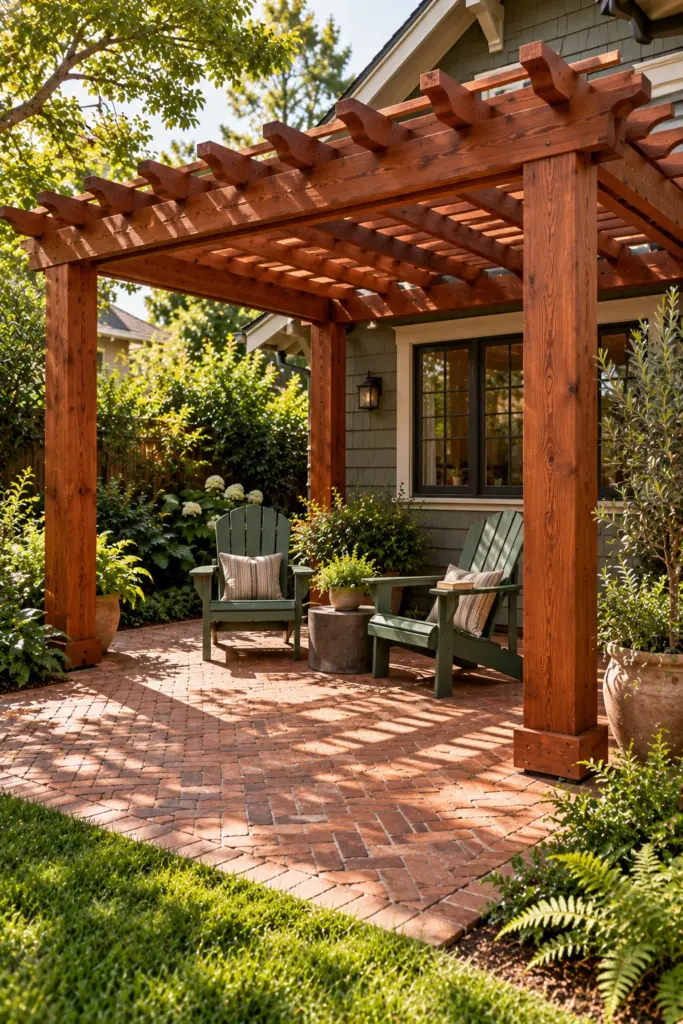
Redwood heartwood carries a deep red-brown color that looks rich beside old brick, and it is the heartwood, not the pale sapwood, that gives redwood its rot resistance. Build with Construction Heart or Clear All Heart posts and beams, lay a herringbone brick patio underneath, and add two Adirondack chairs painted forest green. Redwood is easiest to find and price on the West Coast; further east it is harder to find and usually pricier, and I would put the same money into cedar.
6. Redwood Pergola Sealed to Hold Its Color Beside a Pool
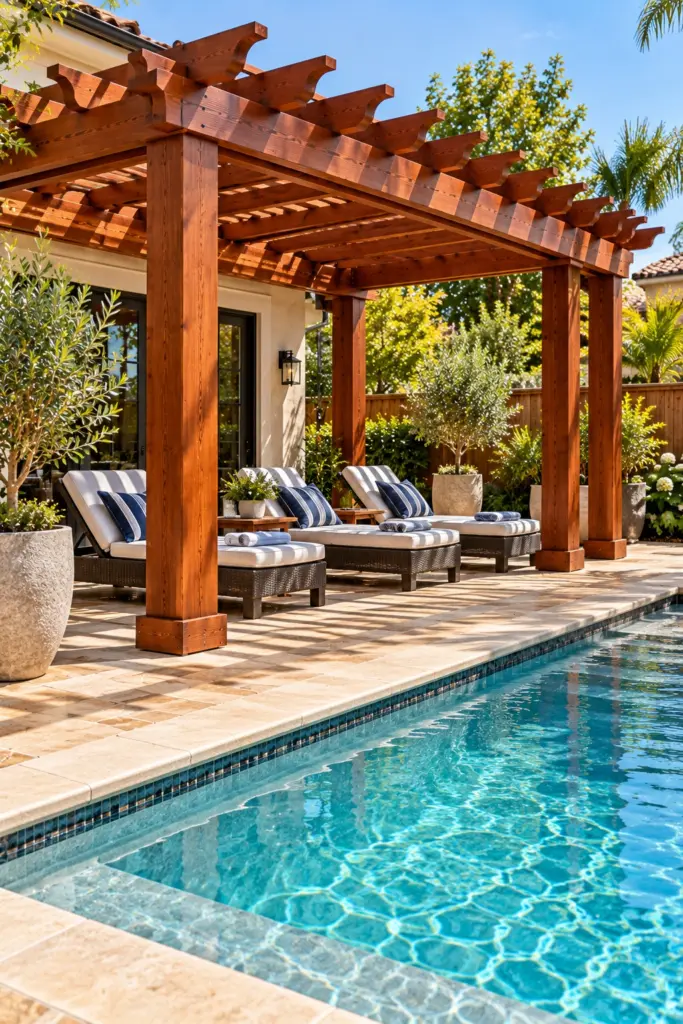
A UV-blocking transparent sealer is the only practical way to keep redwood red, and that warm color is worth protecting next to the bright blue of a pool. Take the heart-grade frame from idea 5, finish it with a redwood-toned penetrating sealer, and set it over sand-colored travertine with navy striped lounge cushions. Public pool codes commonly require 4 feet of clear deck around the water; at home that is a sensible minimum between posts and coping, but check your local rules.
7. Redwood Pergola Mixing Clear Beams With Knotty Heart Posts
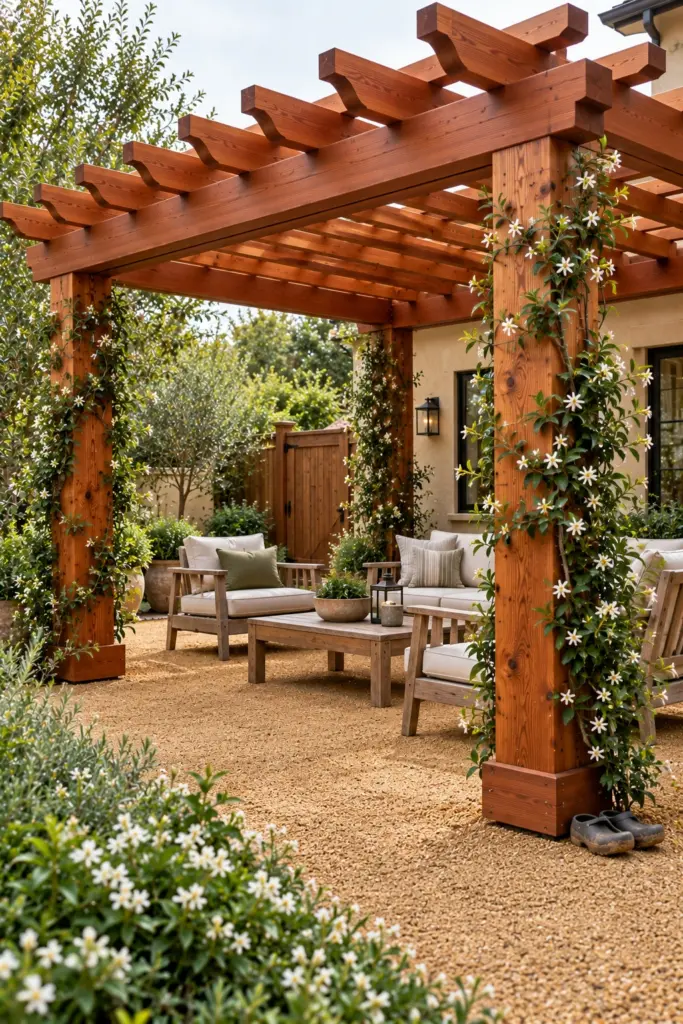
Mixing redwood grades spends money where eyes actually land: knot-free clear boards on the beams and rafter tails people look up at, and cheaper knotty Construction Heart on the posts, which vines partly hide anyway. Stain the whole frame one semi-transparent redwood tone so the grades read as a single piece, then soften the posts with star jasmine on a stainless wire trellis. Clear grades carry a steep premium over knotty ones, and the gap shifts by region, so get both priced per board first.
8. Pressure-Treated Pine Pergola Stained Dark Walnut
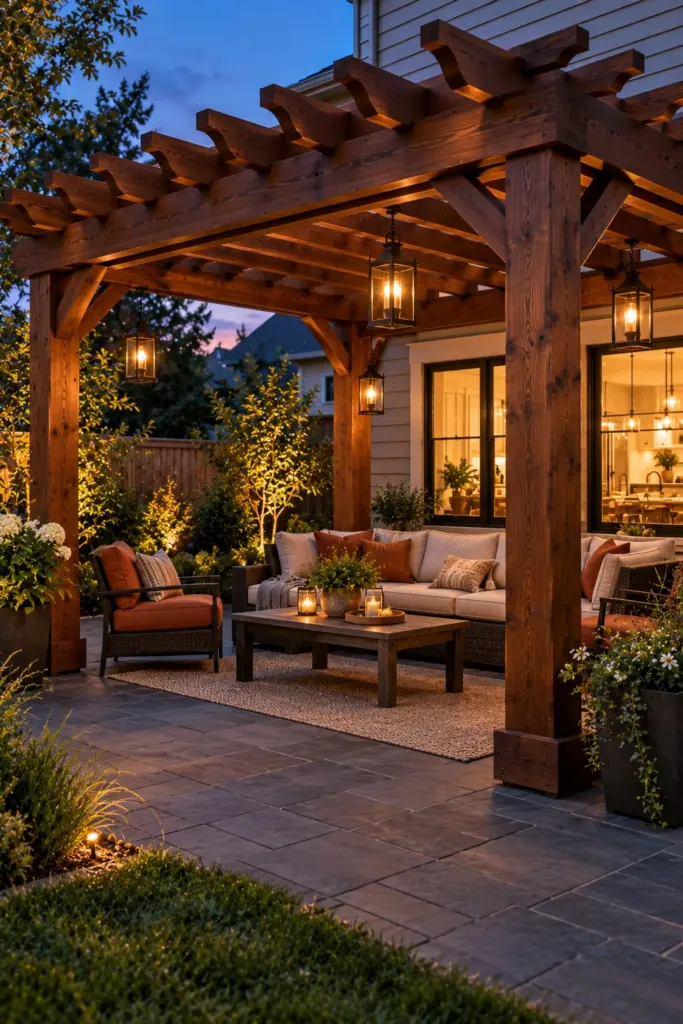
A dark walnut stain hides most of what people dislike about pressure-treated pine, the faint green tint and the busy grain, and it looks settled over charcoal pavers or a gray composite deck. Build with treated 6×6 posts and 2×8 rafters, wait until the lumber has dried, then brush on a semi-transparent oil stain in walnut or dark brown. Hang black metal lanterns and add rust and cream cushions for contrast. Pine usually needs two coats before the color evens out. It is the look I would suggest for a tight budget next to a dark deck.
9. Pressure-Treated Pergola on Raised Standoff Post Bases
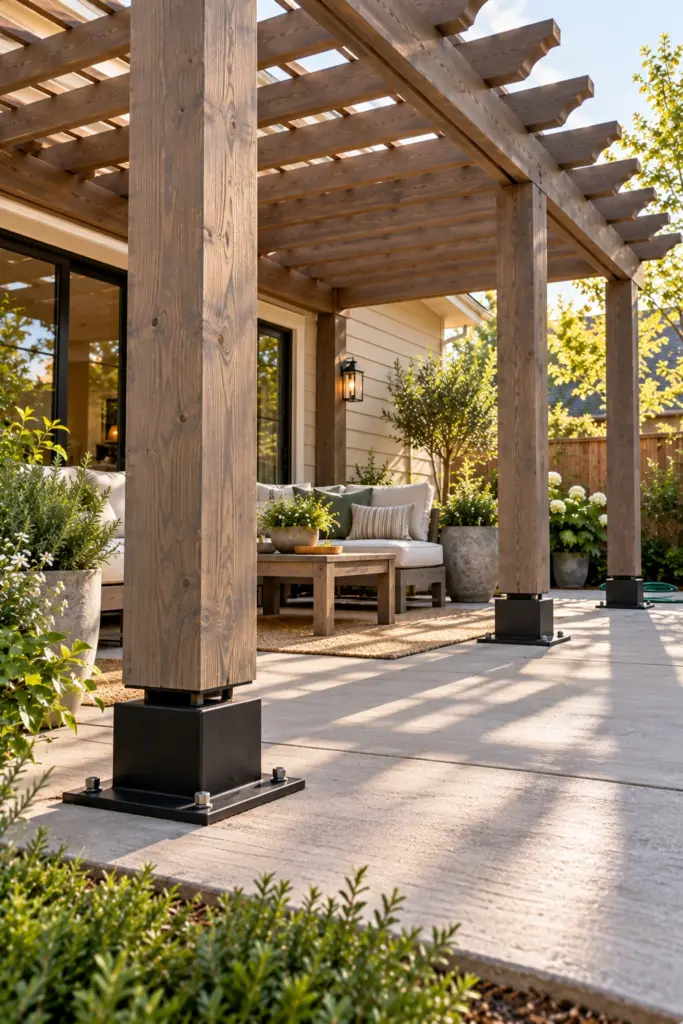
Standoff post bases lift the end grain of each post about an inch off the concrete, and that small gap keeps a pressure-treated pergola from wicking water into its feet. Bolt galvanized or powder-coated standoff post bases into footings or an existing slab, set ground-contact-rated 6×6 posts in them, and finish the frame in a warm gray semi-transparent stain over a brushed concrete patio. The same bases suit cedar, because the base protects the wettest spot. If I could insist on one detail in every wooden pergola, it would be this.
10. Pressure-Treated Pergola Frame Wrapped in Cedar Post Sleeves
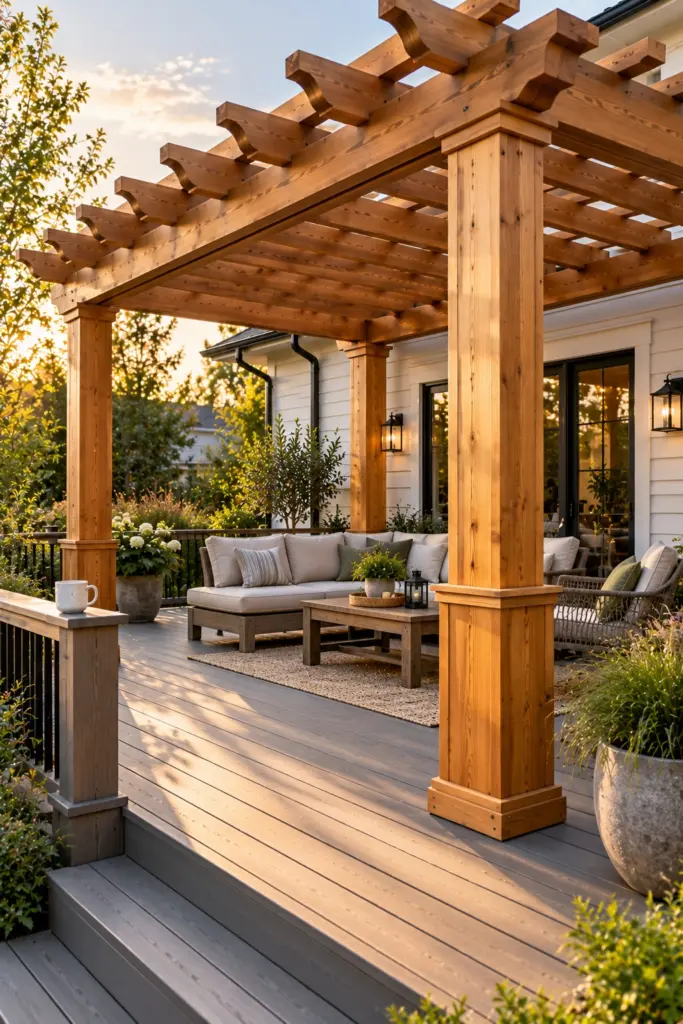
Cedar post sleeves put a clean cedar face on a pressure-treated structure, so the parts you touch and see look premium while the load-bearing wood inside stays cheap and treated. Wrap each treated 6×6 post in a four-sided cedar sleeve with a trim collar at the base, run cedar 2×6 rafters on top, and match the stain to the honey tone in idea 1. Leave a gap of about a quarter inch at the bottom of each sleeve so trapped water can drain out.
11. Pressure-Treated Pergola Finished With Copper Post Caps
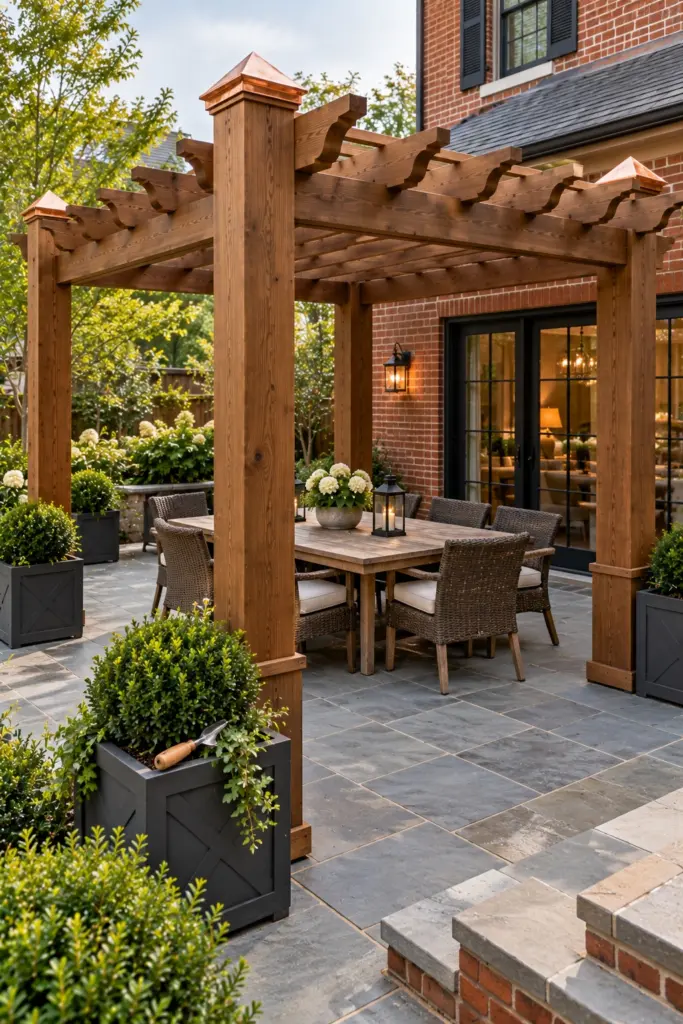
Copper post caps do a real job beyond looks: they shed rain off the exposed end grain at the top of each post, which is where many pergolas start to rot first. Fit pyramid copper caps over the post tops from idea 9, stain the frame mid brown, and let the copper slowly darken toward bronze beside a bluestone patio and boxwood in square planters. Caps sold for a nominal 6×6 fit a post that actually measures 5.5 inches, so measure yours before ordering.
12. Slim Ipe Pergola in a Modern Courtyard
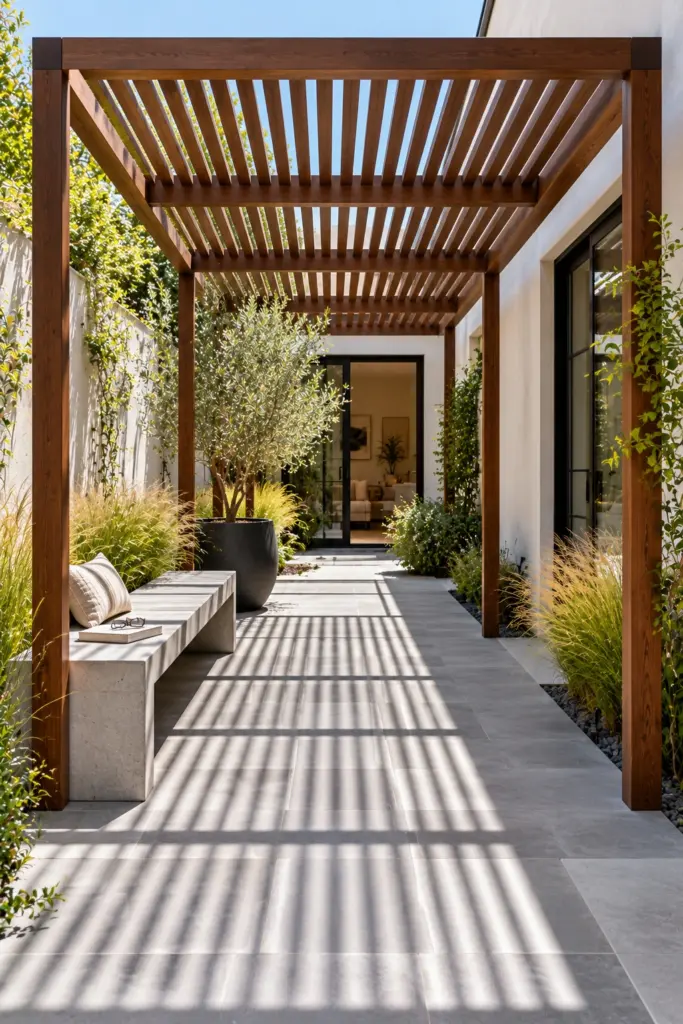
Ipe is dense and strong enough that a pergola can use slimmer members than a softwood frame, which suits a narrow modern courtyard built on clean lines. Frame it with ipe posts and closely spaced 2×2 ipe battens overhead, set it on large-format gray porcelain pavers, and keep the planting architectural with clumping grasses and one olive tree in a black planter. Ipe weighs about three times as much as western red cedar, so plan lifting help and confirm spans with a builder. I would save it for small spaces where every board is on show.
13. Douglas Fir Timber-Frame Pergola With Mortise-and-Tenon Joints
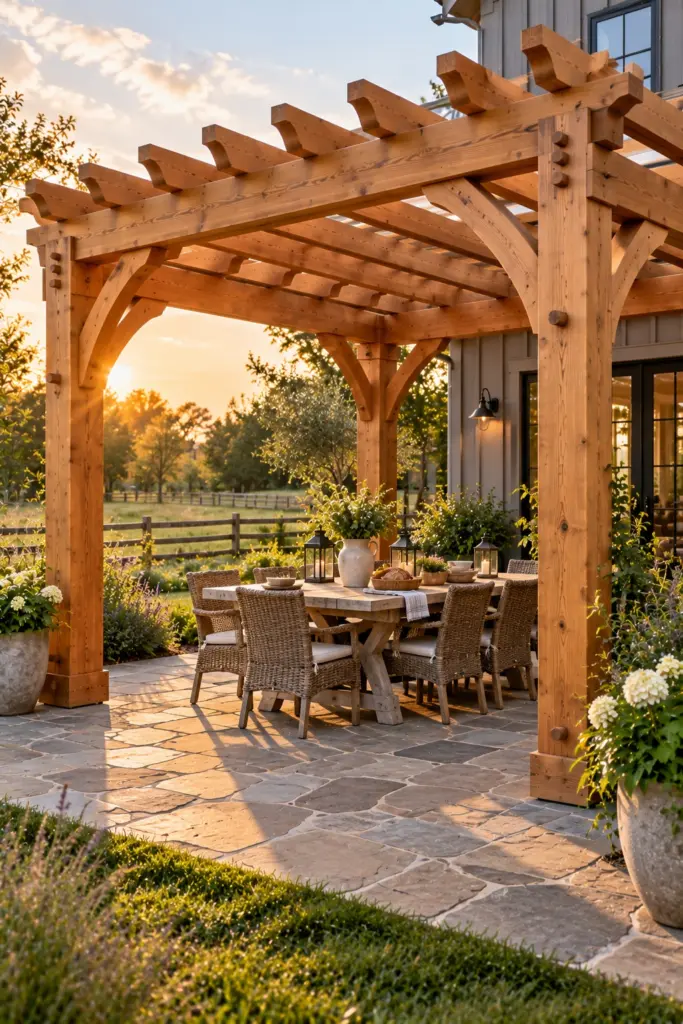
Big Douglas fir timbers give a pergola a heft that dimensional lumber cannot fake, and exposed mortise-and-tenon joints with oak pegs make it feel built by a craftsman. Use 8×8 fir posts and 6×10 beams with curved knee braces, finish them in a light brown penetrating oil, and pair the frame with a flagstone patio and a long farmhouse table. Fir is strong but not naturally rot-resistant, so it depends on its finish and a dry base far more than cedar does.
14. Cypress Pergola With a Porch Swing on a Southern Patio
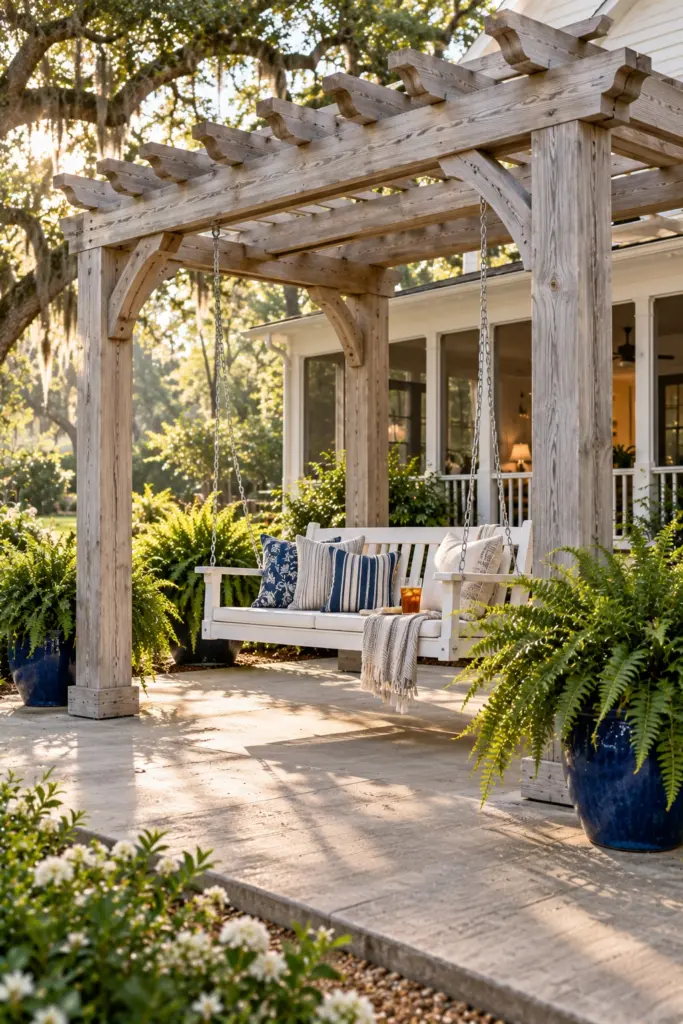
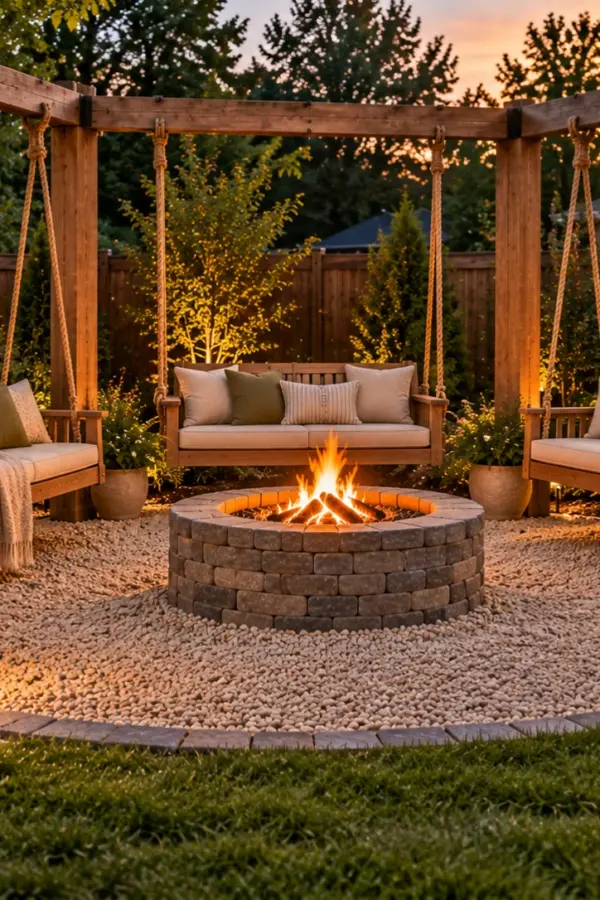
Cypress weathers to a pale driftwood gray that suits humid Southern yards, and it is widely stocked across the Southeast, where it often costs less than shipped-in cedar. Build with cypress posts and rafters, leave it bare or oil it lightly, and set it over a broom-finish concrete patio with a porch swing hung from a doubled beam and ferns in glazed pots. Second-growth cypress sold today is less rot-resistant than its old-growth reputation suggests, so keep the posts on raised bases.
15. Charcoal Solid-Stained Wooden Pergola Against White Siding
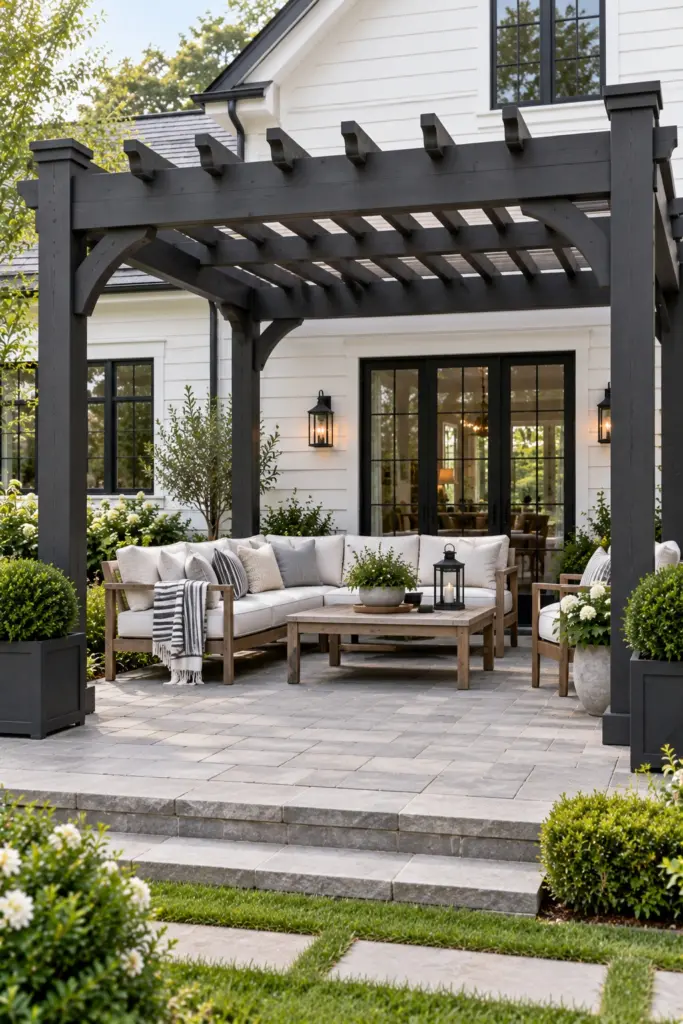
A charcoal solid stain turns any wood into a sharp graphic outline, and against white lap siding it delivers modern farmhouse contrast a natural tone cannot. Solid stain hides grain and mismatched boards, which is why I think it is the smartest finish for pressure-treated pine. Recreate it with a charcoal solid-color exterior stain, black post caps, a light gray paver patio and white outdoor cushions. It gets close to the look of black aluminum while staying wood. Dark stain runs hot in full sun, so shade-side seating stays more comfortable.
16. White Painted Wooden Pergola on a Cottage Brick Patio
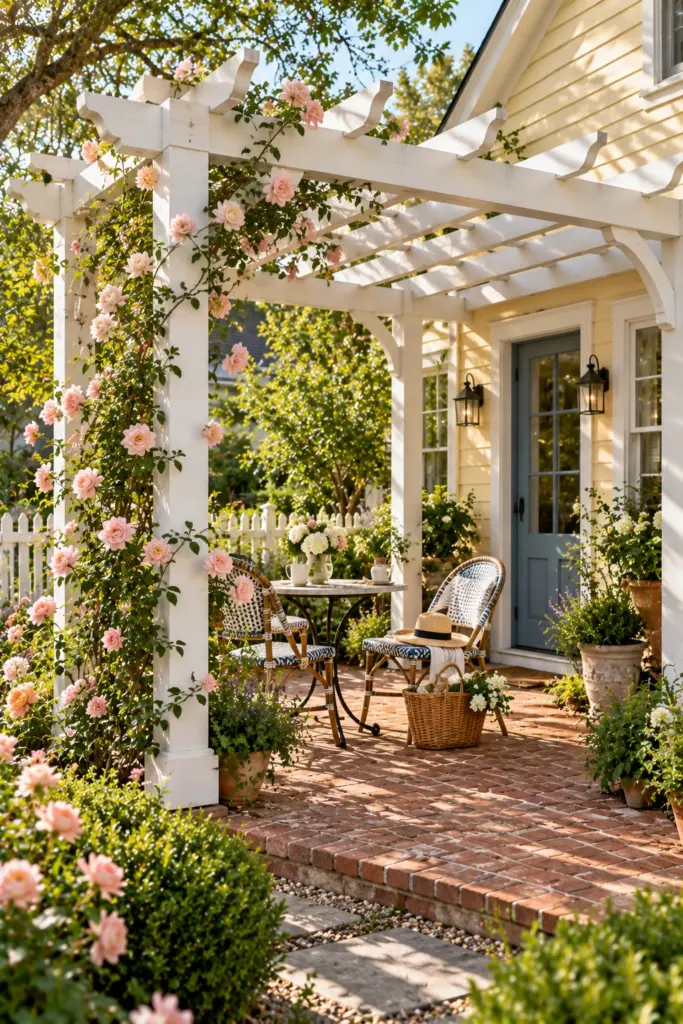
White paint gives a pergola a cottage look that stain cannot, crisp against climbing roses and old brick. Prime cedar or redwood with a stain-blocking oil or shellac-based exterior primer, add two coats of exterior acrylic in a soft white, and train a climbing rose such as New Dawn, which climbs roughly 12 to 20 feet, up the posts. The trade-off is honest: unlike the stain in idea 15, paint sits on the wood as a film and peels where water lingers, usually on rafter tops.
17. Two-Tone Pergola With Black Posts and Natural Cedar Rafters
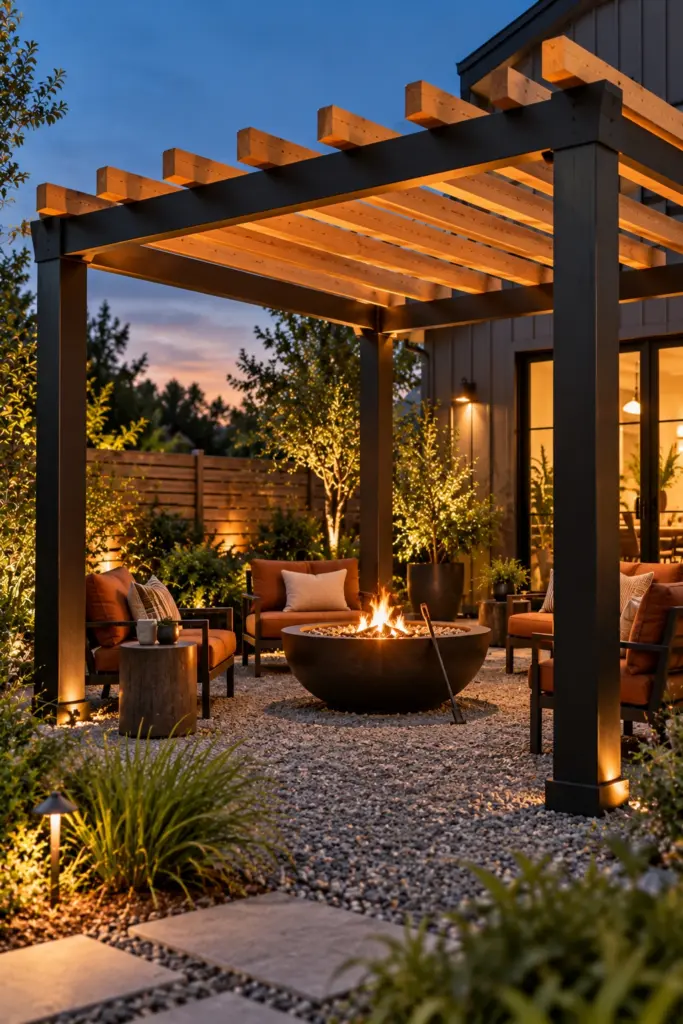
Two finishes on one frame, black on the posts and beams and natural cedar overhead, reads modern and warm at once and makes the roof look lighter. Use a black solid stain on the posts, applied the same way as idea 15, then a cedar-tone penetrating sealer on the rafters, and pair it with a black steel fire bowl, gray gravel and rust-colored cushions. Stain rafters before assembly and mask every joint, because a black drip on raw cedar is nearly impossible to sand out.
18. Natural Wooden Pergola Finished With a Penetrating Clear Sealer
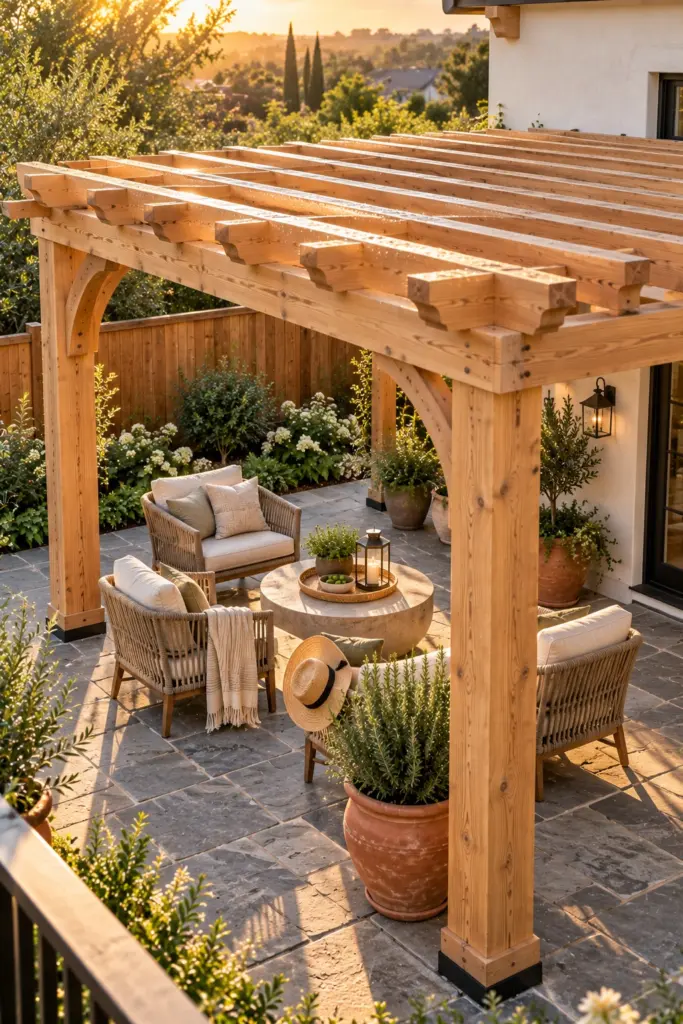
A penetrating clear sealer holds the fresh-milled color of new wood longer than bare wood and never peels the way glossy varnish does, which makes it the lowest-drama finish for a natural look. It sits between the bare silver of idea 2 and a full stain. Choose a water-repellent sealer with UV inhibitors, apply it to cedar or treated pine, and keep the setting simple: gray flagstone, woven rope chairs and a big terracotta pot of rosemary. Clear finishes carry little pigment, so recoat them more often than tinted stain.
Final Thoughts
Here is how I would decide. Want a natural look with the least fuss? Cedar. On the West Coast? Price heart redwood against it. Tight budget? Pressure-treated pine under a solid stain, on raised post bases with sealed cut ends. Want the longest life and have help lifting? Ipe. Then price your pick per year of use before falling for any photo. Still unsure of the footprint? Start with sizing a small pergola for a tight yard. Save this to Pinterest for your lumberyard trip.
Frequently Asked Questions
Western red cedar is the best all-round choice for most pergolas: it resists decay naturally, is light to lift and takes stain well. Heart redwood is similar and easiest to buy on the West Coast. Pressure-treated pine is the cheapest and strong, but moves more as it dries. Ipe lasts longest yet is heavy and slow to work.
About 15 to 20 years is a fair expectation for a maintained cedar or redwood pergola, while pressure-treated pine ranges widely, roughly 10 to 25 years. Grade, climate, drainage and how often the finish is renewed decide where yours lands. A freestanding pergola out on the lawn catches weather from every side, so inspect it each spring.
Stain is the lower-maintenance choice for most wood pergolas, because it soaks in instead of forming a film that can peel. Bare cedar, redwood or cypress can be left to weather gray if you like that look. Paint suits a cottage style but needs scraping when it fails. Recoat intervals vary widely with sun and product, so follow the label.
Roughly $2,500 to $5,500 installed in pressure-treated pine and about $4,000 to $8,500 in cedar, based on 2026 cost guides. Region, footings and hardware move the number a lot, and building it yourself cuts out labor. Instead of four posts, mounting a pergola to the house saves two posts and their footings, though the ledger needs careful flashing.
Loved this? Pin it so you can find it later.
Pin this post
Sana Ahmed
Hi! I’m Sana, and I’m always looking for fresh ideas to make outdoor spaces more beautiful and enjoyable. I love exploring everything from cozy patios and pergolas to backyard fire pits, privacy solutions, and charming garden sheds. I’ll be sharing the ideas that catch my eye and hopefully help you find a little inspiration for your own outdoor space.
All postsKeep reading